Showing posts with label Comfort Food. Show all posts

Sunday, March 18, 2012

Bean Balls with Garlic Sauce - Vegetarian


Aren't they beautiful?

Despite the good taste, they are however lack of a tiny bits of moisture...

And easily falling apart...

Maybe i should have joined Egg? or maybe Tofu to make it firmer? Idea?
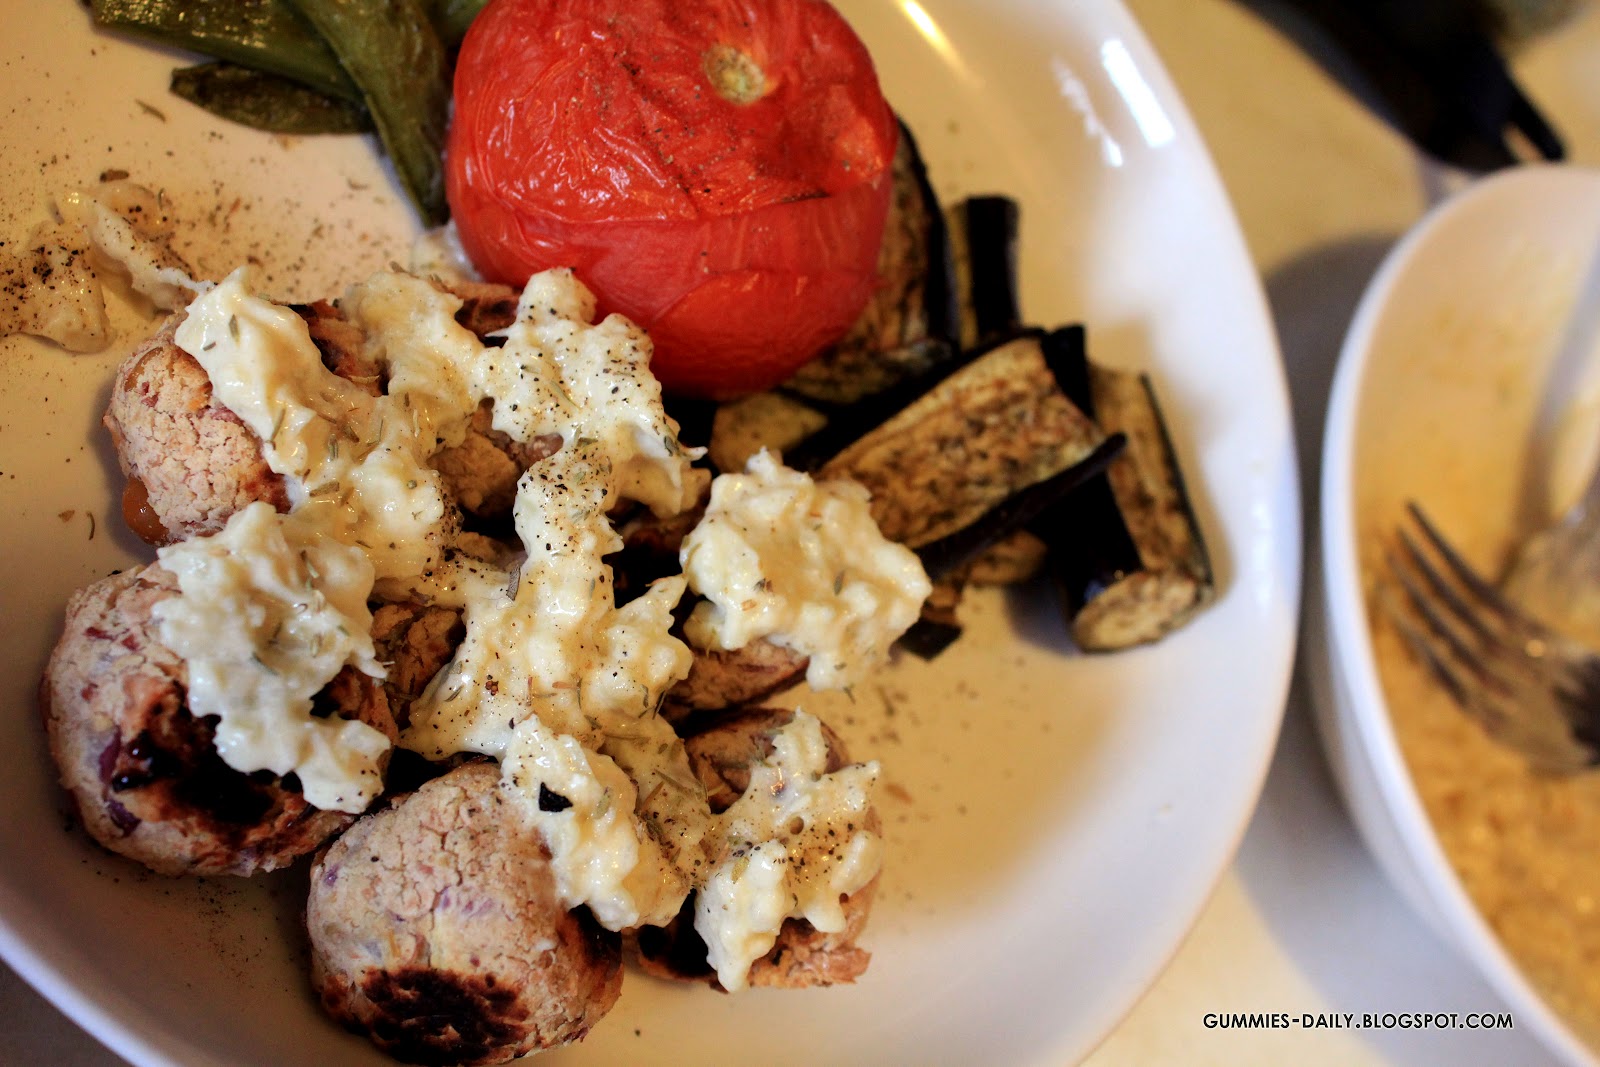
The nonsense sauce was a steal though! being too "creative" a.k.a "short of ingredients at home" (sounds well at the beginning, failed at the end, lol) , i mix matched everything i can grab from the pantry... : )

At the first glance i saw garlic!! Aha... I ever ate something-something with garlic sauce... ticked!

I wanted something sour, so yogurt works!! ticked!!

Look at the white boring colour and tasteless still sauce, i mixed dried thyme leaves (just a bit, i wanted only colour), salt & pepper, lemon juice and a dash of mustard powder (too much no good)..

And the final touch was truly fab... few drops of SESAME OIL!! i just love how sesame oil enhance the taste of this garlic sauce!!

To make it healthier, i paired the bean balls with roasted snow peas; eggplant and tomato (they were all lightly oiled; salted; pepper-ed and roasted).. the taste was just as lovely as its colour!!

Bean Balls with Garlic Sauce

Bean Balls
Makes 15 balls
Ingredients:
400 gr Mixed Bean - no added salt, mashed ( i used Edgell)
1 tsp Vegetable Powder (or adjust to taste)
3 heaped tbsp Gluten-Free Bread Crumbs *approx*
1/2 medium Red Onion, cubed
1 tsp Olive Oil
Extra Olive Oil to pan-fry

Method:
  • Drained the beans and mash with fork until completely smooth, set aside
  • Peel the onion, and tinily cubed
  • Add in vegetable powder, bread crumbs, olive oil, and cubed onion in a bowl of mashed beans, Combine well
  • Shape the bean mixture to ball
  • Lightly grease olive oil in a heated non-stick frying pan, pan fried the bean balls at very low heat for roughly 10 minutes, flip each sides in mid-way (they get burned very easily)*


N.B: The bean balls could be very hard to handle, be careful while handling.. let me know if you have a good suggestion... 

Garlic Sauce
Make 2 serves
Ingredients:
2 whole Garlic, skin on, roasted
2 tbsp Natural Yogurt
1 tbsp Lemon Juice
1 tsp Sesame Oil
Dash of Mustard Powder (not too much)
Dried Thyme Leaves
Salt and Pepper to taste

Method:
  • Cut off the root end of garlic, wrapped with aluminium foil and roast for 15 minutes (or until soft) at 220 degree heated oven
  • Meanwhile, in a small bowl mix yogurt; lemon juice; sesame oil; mustard powder; dried thyme leaves, set aside
  • Take the roasted garlic out of oven, simply squeeze the garlic out of its skin, mashed, combine with the yogurt mixture
  • Salt and pepper to taste

Oh... and don't forget to treat yourself with a breath freshener sweets after meal! hahaha... you still love garlic? i love!!!


Happy Cooking!!
xoxo

Saturday, March 17, 2012

BBQ Tempeh

Fresh from the oven...

Triggers my mind to have'em a bite!!


The fragrance was just oh-so-nice!!
The texture was just oh-so-delicious!!

And the colour was just oh-so-tanned and oh-so-sexy!!

From this moment, i know biting a thickly sliced tempeh was just oh-so-blessed!!


They are just the greatest gift from GOD * Bear with me!! i am getting exaggerating*

But, i couldn't help myself to stop over-describing...

Just because they were simply yummy!!

BBQ Tempeh
Serve 5-6 (a possibilty to be reduced to 3-4 serving, because they are really yum, hehehe...)
Ingredients:
2 blocks Tempeh, thickly sliced (250 gr each block)
Lots of Garlic, peeled ( i used 1 1/2 whole Garlic)
Lots of Shallot, peeled (i used 4 Shallots)
Kecap Manis (Sweet Soy Sauce) - i used 2 tbsp *approx*
Salt and Pepper

Method:
  • Using Mortal and Pestle, coarsely pound the garlic and shallots
  • In a bowl (or ziplock bag), combine pounded garlic, shallots, kecap manis, salt & pepper. Mix well
  • Add in tempeh, toss
  • Marinade for at least 4 hours (best leave overnight) in the fridge - i left mine overnight
  • Next day, line the baking tray with aluminium foil, lightly grease with olive oil
  • Arrange tempeh on the baking tray, oven-bake for 20 minutes *approx* (10 minutes each side) in a 220 degree heated oven
  • Serve warm
Yummehhh...

Friday, March 16, 2012

Oatmeal Porridge - Instant Energy, Instant Happiness

Ok, this post is going to be very "mushy"...

As mushy as this oatmeal porridge... 


This bowl of goodness contains mixture of Oatmeal, Mashed Banana & Mixed Berries, Flaxseed, Natural Yoghurt, Protein Powder, Soy Milk and drizzle with a little bit of Maple Syrup... Finished with Desiccated Coconut and Peanut Butter....Chilled overnight in the fridge...

The next morning, I wake up to welcome this delicious, nutritious and filling breakfast that packed with lots of protein, vitamin, fibre and other goodness... i scooped this thick and doughy porridge, and someone was calling me in the dark... 

Mr.S : Honey, don't forget to give me a goodbye kiss while you leave to work later... (sleepy voice)

Me   : ....................................... (smiled and feel contented)

This bowl of goodies didn't just give me an instant energy but it also gave me an instant happiness for this whole day...

Thank you!

xoxo

P.S: the photo at the background was taken in Ngong Ping Cable Car while travelling to Hongkong in this early January.. Costs me 300 HK dollar (with other accessories), just because the sales girl said i look very pretty in this photo, lol!! *you can puke now* 


Thursday, March 15, 2012

Nyonya Food-Babi Pongteh

I have an obsession of watching a Singapore drama, Little Nyonya... i have watched it over and over again...

There were lists of Peranakan food had been mentioned during the drama, which attracts me to find out what are they?

One day, i was browsing on Rasa Malaysia, and discovered a Peranakan recipe which makes me so tempted to cook - Ayam Pongteh ...

Instead of using chicken, i use lean pork in this dish and it turns out allright, causing a less-meat eater like me love it so much : )


It doesn't require a complicated ingredients to cook this Babi Pongteh, i purely adapted the whole process of how Rasa Malaysia did...


However, time is required to perfect this Babi Pongteh... because of using lean pork, it takes double times to simmer the meat until tender... ( i simmered the pork for 2 hours, added water in mid-way to prevent burning, and added potatoes at the last 1 hour)...


Wednesday, March 14, 2012

Century Egg and Pork Porridge


I grow up eating porridge, until someday Porridge has become a big No-No for me... As a Teochew, my family loves cooking Plain Porridge to eat with lots of side dishes such as Pickled Vegetables; Salted Duck Egg; Braised Peanut; Fermented Tofu; Preserved Olive Leaves; and etc...

Some time my grandma even only mix the porridge with dark soya sauce...Hmmm, No-No-No-Noooooo...

She's bravo!

But when it comes to a flavoured Hongkong-style Porridge, i would say Yes-Yes!! and my favourite is which most of people will adore as well...  You agree? 

Century Egg and Pork Porridge
Serve 1
Ingredients
1 small bowl of cooked white rice*
1 small bowl of water* (or more, depends on personal preference)
1 Century Egg, boiled
Lean Pork slices ( i use 5 slices per serving, as i do not eat meat very much)
1/2 tsp Chicken Powder
Sesame Oil and Pepper to serve (optional)

N.B: I use the ratio 1:1 for rice and water

Method
  • Boil Century Egg for 5 minutes, or until it cooks, chill in a bowl of cold water
  • Meanwhile, add a bowl of rice together with water into a blender, blend to a finer porridge texture*
  • Transfer blended porridge to a pot, add in lean pork slices, simmer in low heat until it cooks
  • Add in seasoning (chicken powder; sesame oil and pepper), mix well
  • Peel century egg, quartered, or thinly sliced
  • Arrange on the top of the porridge
  • Serve warm

N.B: I use a short-cut to serve porridge, as the original way to cook porridge is using a slower-cooking method, which requires lots of hours :p

Happy Cooking!!
xoxo